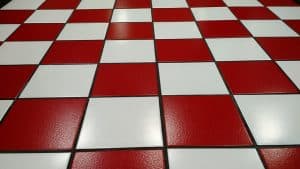
 You’re ready to tackle bathroom remodeling. You have dreams of custom showers with steam features, granite vanity countertops, and more. However, all these specialty items can carry a hefty price tag. While you don’t plan to do the whole job yourself, you figure you can cut costs by doing some of the demolition stage—including removing that old tile flooring.
To get the job done right, our crew at Indy Renovation recommends that you follow these few tips (adapted from tips found on DIY Network).
1. Get the right tools.
Before you start any job, you want to make sure you have the correct tools to do it right. A few essentials include a hammer, chisel, pry bar, and scraper. You’ll also want to have clean-up supplies on hand to get rid of the mess as you go. Some people also opt to rent tools instead of purchasing them, in order to get professional-grade tools without having to incur a greater cost.
2. Take out old fixtures first.
It’s easier to take out a tile floor if you have first removed other bathroom fixtures you don’t intend to keep. Go ahead and carefully remove the toilet, the vanity, or anything else you don’t intend to keep. (If you’re not sure how to do this, ask an expert like Indy Renovation, or do your research.)
3. Find a good starting point.
Your best bet is to start removing tiles near where you already removed bathroom fixtures. That way, you can use your pry bar, hammer, and chisel to get underneath the tile and begin to remove it.
4. Use your tools, and take your time.
Many people think demolition is a quick process, but that’s just not the case. While removing tile can be done in a day, you don’t want to rush your work. Take your time with your tools, and do the job right so you don’t end up with a bunch of broken tile pieces or mortar or grout that didn’t come up.
5. Remove damaged underlayment.
A tile floor doesn’t always have underlayment, but if it does, be sure to check it for water damage. You should remove any damaged pieces and replace them before installing new flooring. Be sure to also remove any nails that are popping up.
6. Clean up every nook and cranny.
Removing tile can be a messy business. Roll up your sleeves, pile large chunks of debris into a trash bag, and grab a broom or an industrial vacuum cleaner to sweep up the smaller, finer pieces and dust. You may need to do it a few times before you get it clean.
Your bathroom floor is now a blank slate ready for an update. If these steps seem too cumbersome or if at any point you decide the DIY thing isn’t for you, you can always contact Indy Renovation at (317) 375-4464. We’d be glad to help you with any stage of your bathroom update. From demolition to finishing details, we’re the experts in Indianapolis for bathroom remodeling and plumbing.
photo credit: public domain via pixabay